This article is a more detailed version of the Firewall automatic installation article.
The Universal Plugin is designed for Linux servers running PHP and supports major web applications, including WordPress, PrestaShop, Whmcs, CRM, ERP, and framework-based apps like Laravel and Symfony—even static PHP landing pages.
- License:
To obtain a firewall license, simply enter your email on the Universal Plugin installer page—no forms, credit cards, or subscriptions required. The email must be valid and would require verification withing 24h of getting the license. Always check your spam inbox, if you are using a non private service like Google. We do not accept emails related to Microsoft like @outlook.com, @msn.com
- Resellers: Licenses for customers must be obtained automatically via the client area or API (WHMCS, WiseCP, ClientExec, etc.).
- Requirement:
- PHP v5.6+
The plugin is designed to work with default PHP internal functions enabled, ensuring compatibility with most servers (installation will fail if the plugin detects abnormal settings or server misconfiguration).
The plugin is extremely lightweight and has a minimal footprint, so it won't consume significant disk space, memory, or CPU resources.
- Apache/Nginx, (most of servers on the world) with .htaccess and default server configuration.
- Installation:
- Download the Universal Plugin file "fi.php", then upload it to your application’s root directory (where the main index page is, typically www, public_html, etc.). This file will be valid 4 hours after downloading.
- If your domain is www.example.com, visit www.example.com/fi.php. The installer page will appear. (For security reason, the installer page will display a 404 not found error, 4 hours after you downloaded it and you will have to download it again):
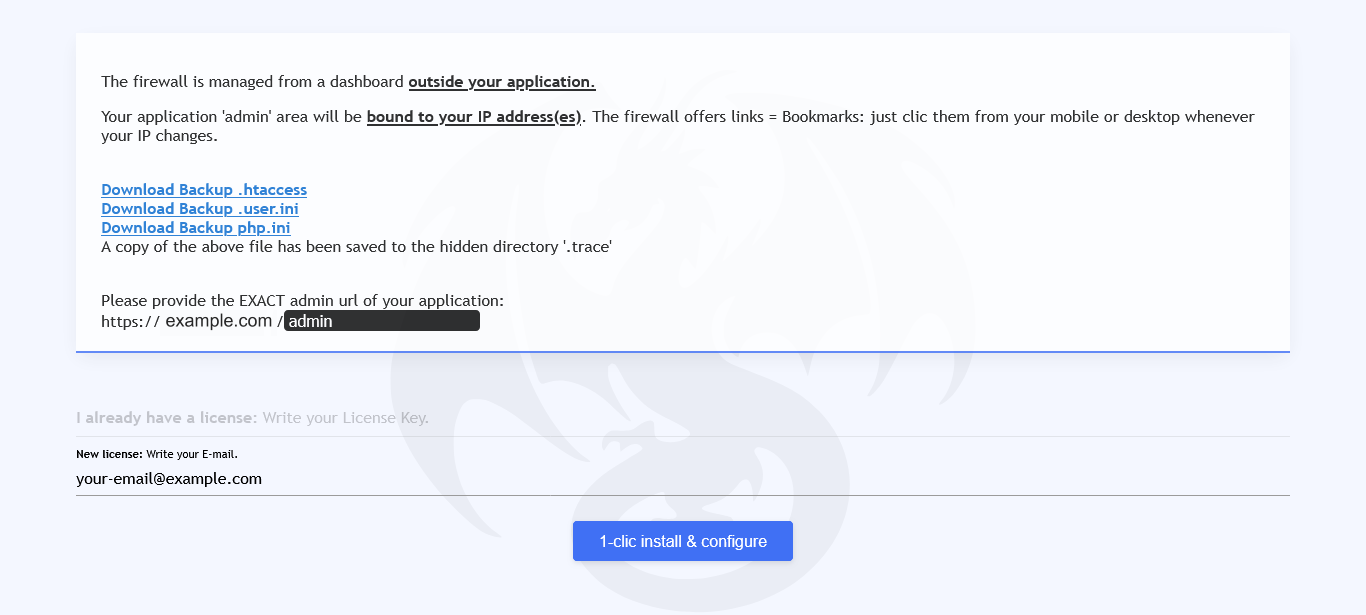
- If you don’t have a license, enter your email.
- If you do have a license, enter the license key instead.
- Click the button at the bottom, and the firewall will be installed and configured automatically.
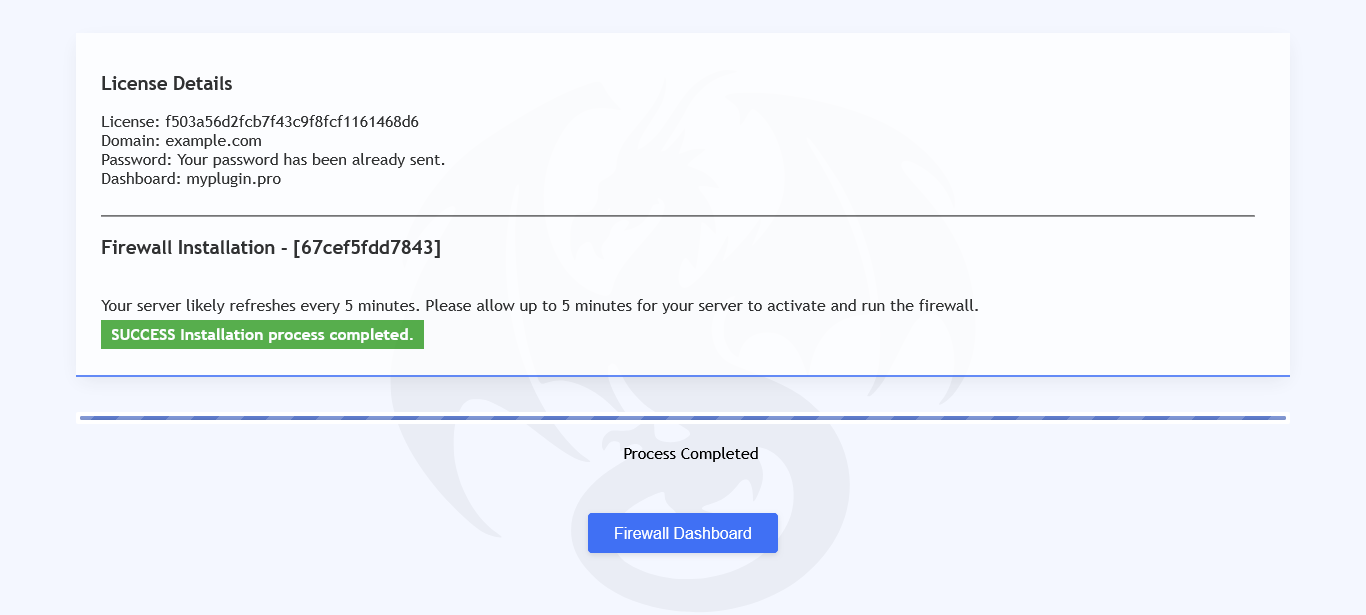
!!! IMPORTANT: Copy your new firewall dashboard password! It will NOT be sent via email.
- Admin URL:
The installer attempts to detect your application among hundreds of applications fingerprint in its data base and locate your admin (back-office) URL. If it shows “unknown” or an incorrect path, manually enter the correct admin directory relative to your domain.
Example: If your admin panel is at www.example.com/administrator/, enter "administrator" in the related field. (replace example.com by your domain name)
This is crucial step, to protect your application back-office. You can edit that setting later from the firewall dashboard, but it's extremely recommended to confirm that during the installation.
Here are images of the simple installation step:
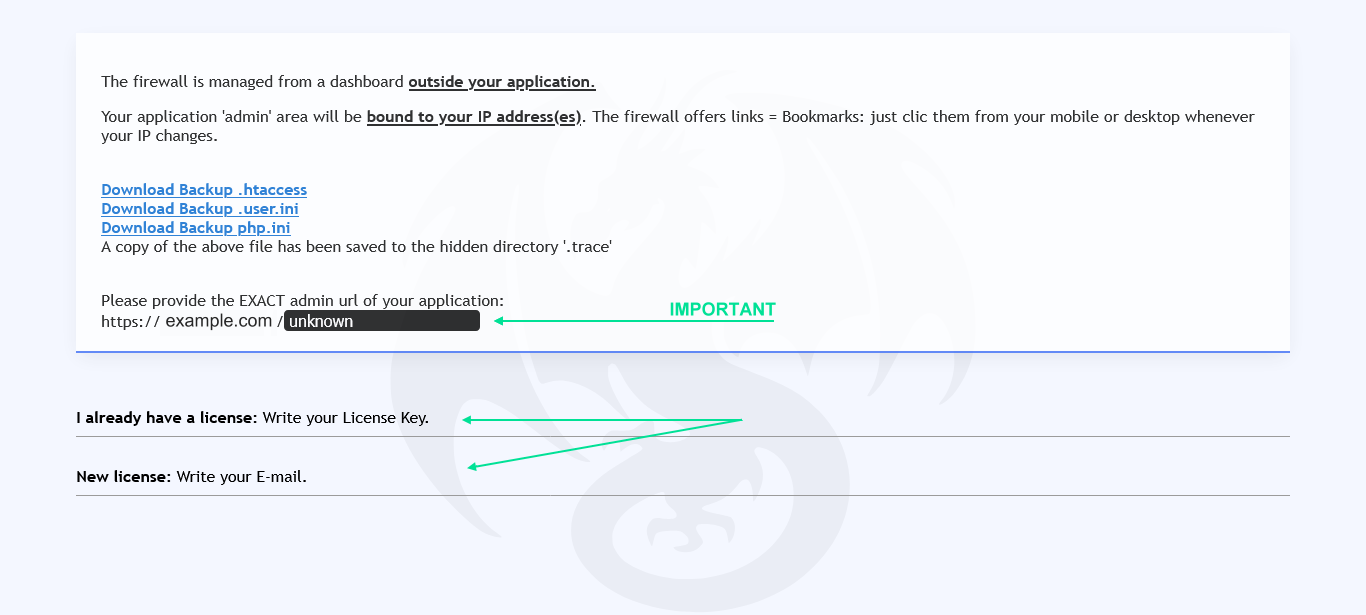
Create a new license by providing your e-mail, or, provide your license key if you have one.
Remember to confirm the admin (back-office) directory address.
Related articles: